
Eduroam - Apple Mac Connection Manuals | Information Systems & Services
Apple Mac Connection Manuals for Eduroam
Welcome to the Apple Mac Configuration Manuals Section of the ISS Site. Click on the relevant links below to learn more about connecting to Eduroam with the various Mac Operating Systems.
Mac OS 10.4
Create an Eduroam Profile in MacOS 10.4
N.B. if you have difficulty seeing the detail in any of the images then right click and select view image.
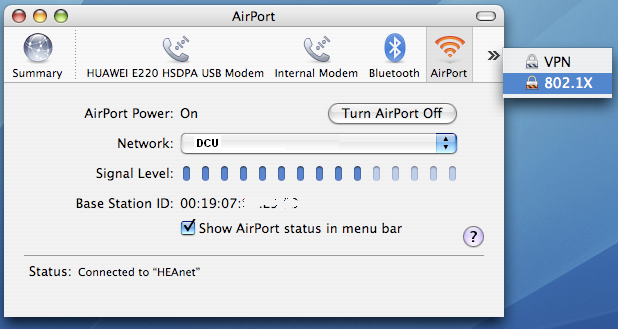
- Click on the wireless icon
 (in the menu bar at the top of the screen). Select 'Open Internet Connect'....
 - Click 802.1X (this button might not be immediately visible in which case you'll have to click on the rightmost arrow icon to see it, as shown in this image).
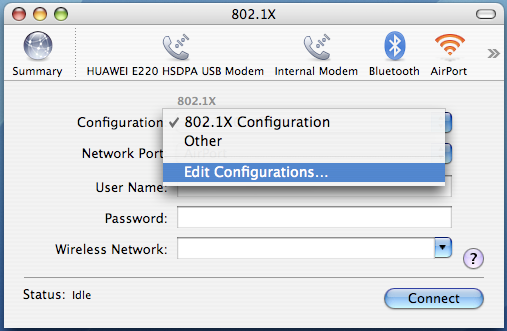
- Click the Configuration drop pull-down menu and select Edit Configurations...
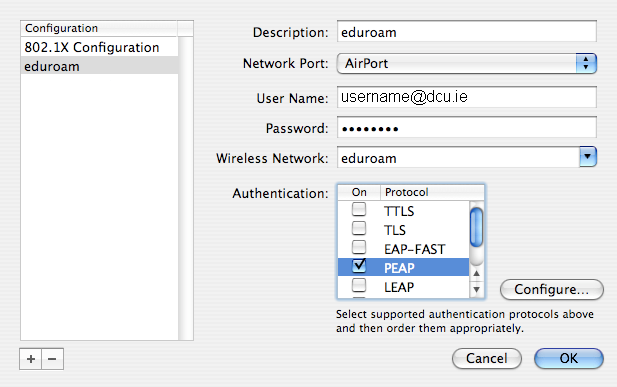
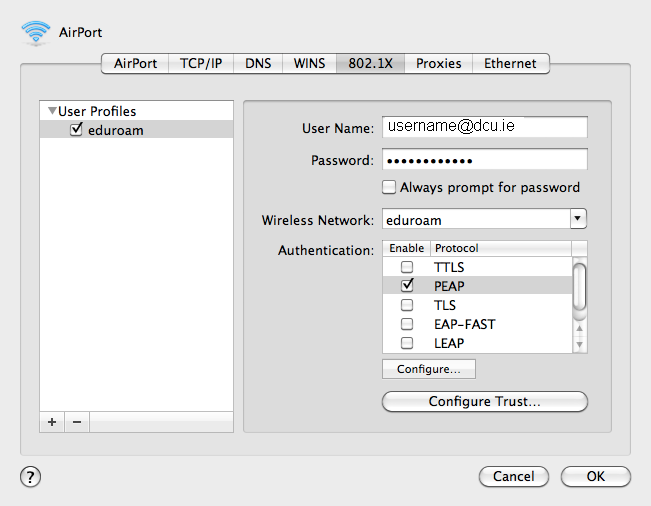
- Click + in bottom left corner of window and enter the details as per the diagram below.
N.B. You must enter your DCU Novell/AD network username and password in the form of : username@dcu.ie e.g. bloggsj22@dcu.ie
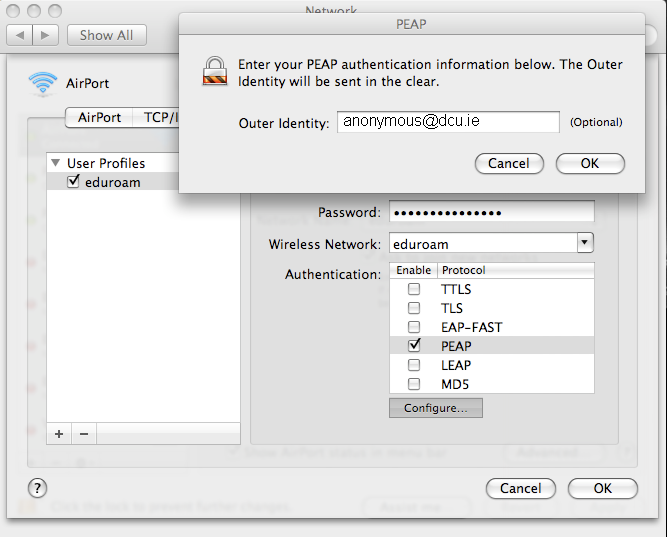
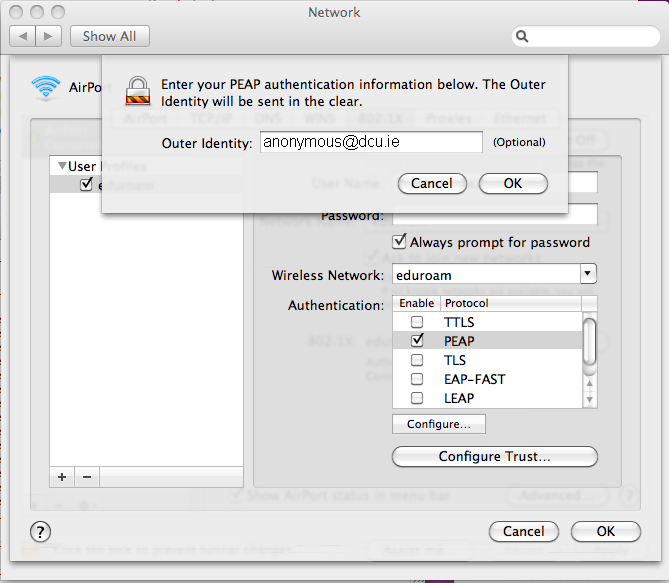
The password is NOT your e-mail password it is your network password used for such systems as Portal pages, Moodle, Novell, AD etc. - Select PEAP and click Configure...
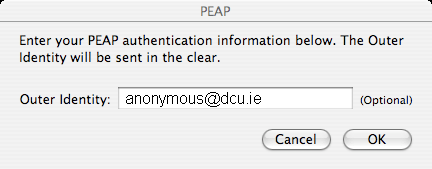
Enter anonymous@dcu.ie - Click OK
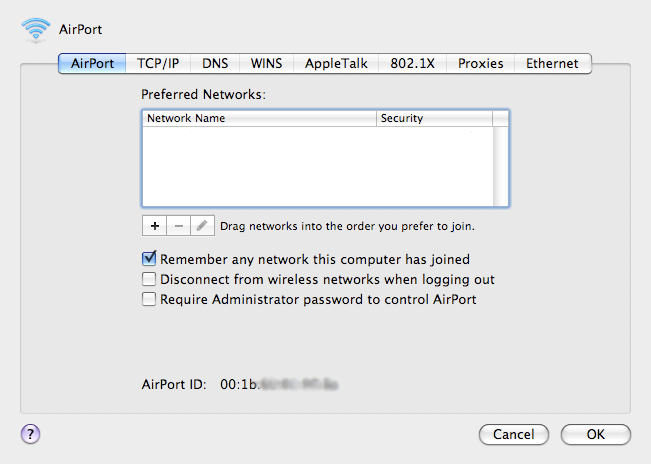
- To make eduroam your preferred network, within the left pane drag the eduroam entry to the top of the list of networks/configurations.
- OK
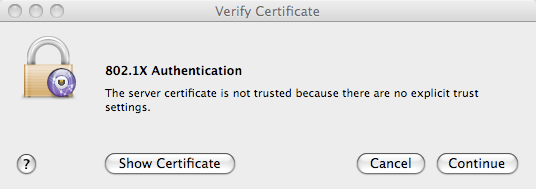
- A "Verify Certificate" pop-up window will display on your screen.
Click Continue
Your wireless client is now configured to avail of eduroam and should connect automatically when at a site where the eduroam service is available.Using eduroam for the first time. When you use your new Eduroam profile for the first time you will be required to verify the details of the authentication server you are talking to, as follows:
Mac OS 10.5
Create an Eduroam Profile in MacOS 10.5
N.B. if you have difficulty seeing the detail in any of the images then right click and select view image.
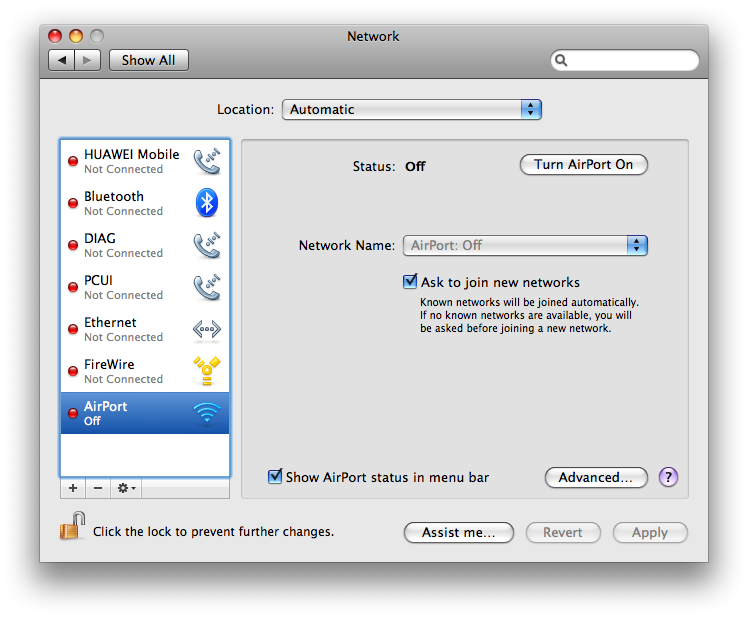
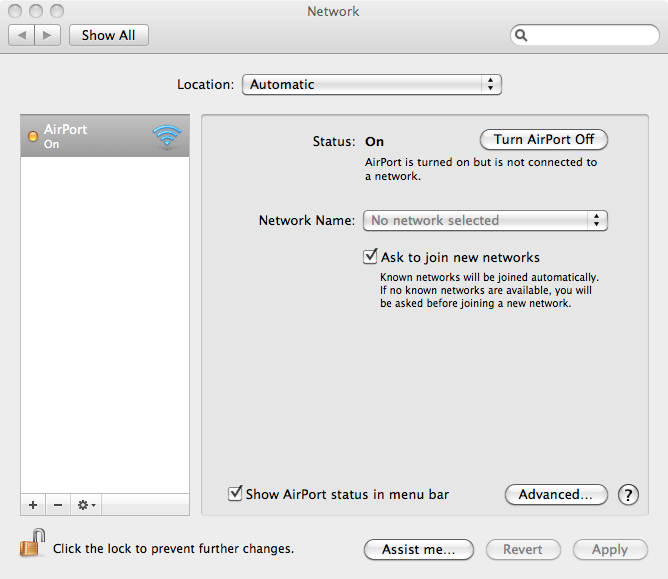
- Click on the wireless icon (in the menu bar at the top of the screen).
- Select Open Network Preferences....
- Select Airport and click Advanced...
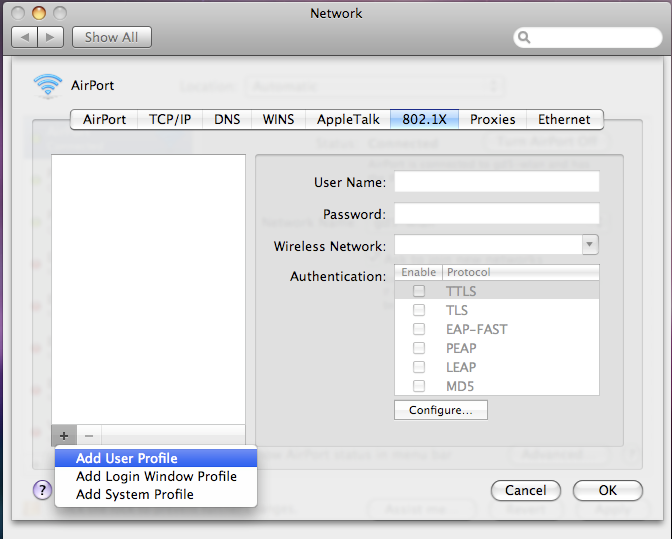
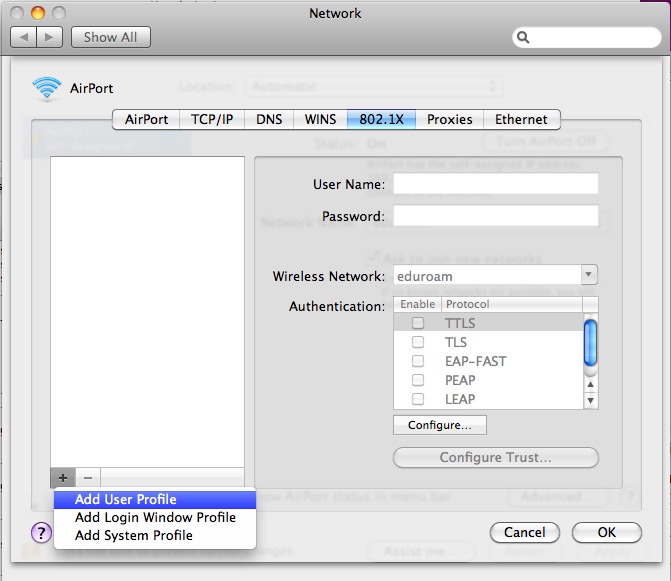
- Click on the 802.1X tab then click on + and select Add User Profile.
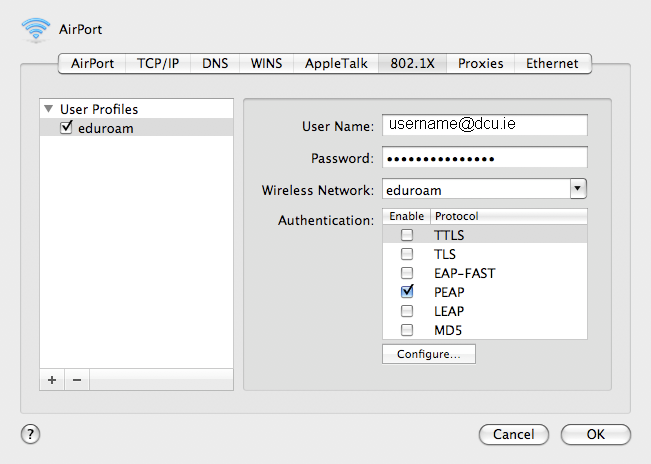
- Enter the details as per the diagram below.
- Select PEAP and click Configure.... then enter anonymous@dcu.ie
- Click OK
- Click OK at the new profile window.
- Click Apply in the Network window.
- Highlight Airport and click Advanced... once more
Click on + to add eduroam as a preferred network. - Click Add.
- You can make eduroam your preferred network by dragging the eduroam entry to the top of the list of preferred networks.
- Click OK.
- Click Apply.
- A "Verify Certificate" pop-up window will display on your screen.
Click Continue.
N.B. You must enter your DCU Novell/AD network username and password in the form of : username@dcu.ie e.g. bloggsj22@dcu.ie
The password is NOT your e-mail password it is your network password used for such systems as Portal pages, Moodle, Novell, AD etc.

Your wireless client is now configured to avail of eduroam and should connect automatically when at a site where the eduroam service is available. When you use your new eduroam profile for the first time you will be required to verify the details of the authentication server you are talking to, as follows:

Mac OS 10.6
Create an Eduroam Profile in MacOS 10.6
N.B. if you have difficulty seeing the detail in any of the images then right click and select view image
- Click on the wireless icon (in the menu bar at the top of the screen).
- Select Open Network Preferences....
- Select Airport and click Advanced...
- Click on the 802.1X tab.
- Click on + and select Add User Profile.
- Enter the details as per the diagram below.
- Select PEAP and click Configure.... Enter anonymous@dcu.ie
- Click OK
- Click Configure Trust...
- Select Servers tab.
- Click + and name the new entry idp-wireless.dcu.ie
- Click OK
- Click OK at the new profile window.
- Click Apply in the Network window.
- Highlight Airport and click Advanced... once more
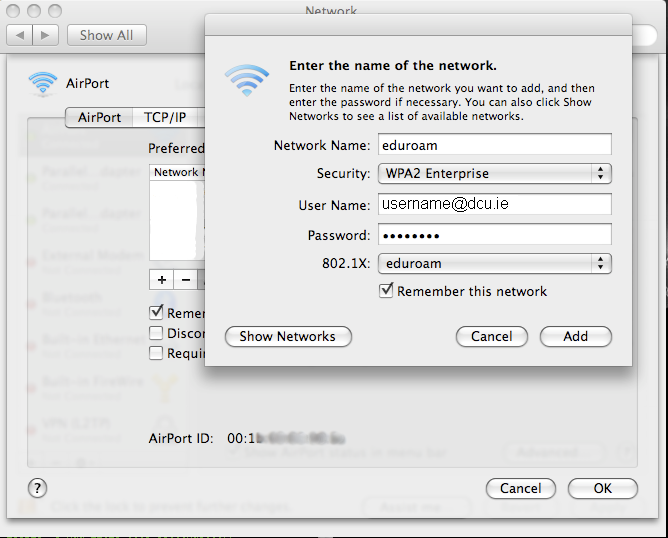
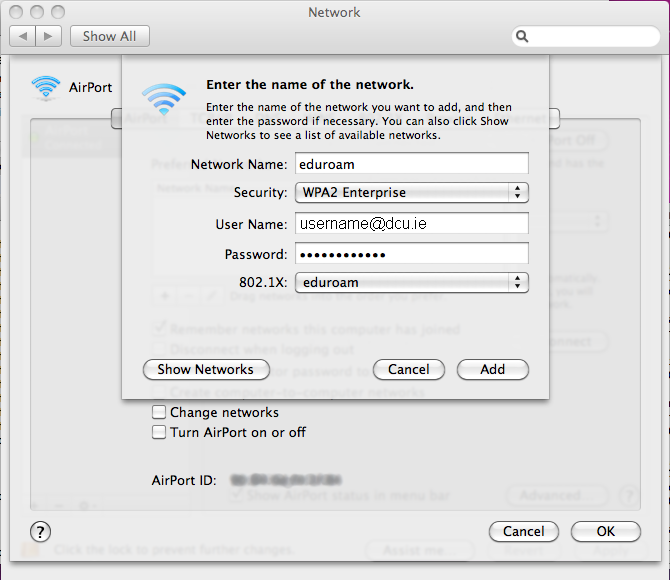
- Click on + to add eduroam as a preferred network.
- Enter the details as per the diagram /sites/default/files/iss/images/.
- Click Add.
- You can make eduroam your preferred network by dragging the eduroam entry to the top of the list of preferred networks.
- Click OK.
- Click Apply.
N.B. You must enter your DCU Novell/AD network username and password in the form of: username@dcu.ie e.g. bloggsj22@dcu.ie
The password is NOT your e-mail password it is your network password used for such systems as Portal pages, Moodle, Novell, AD etc.

Mac OS 10.7
Create an Eduroam Profile in MacOS 10.7
N.B. if you have difficulty seeing the detail in any of the images then right click and select view image
- Click on the wireless icon (in the menu bar at the top of the screen).
- SelectOpen Network Preferences....
- SelectAirport and click Advanced...
- Click on the 802.1X tab.
- Click on +and selectAdd User Profile.
- Enter the details as per the diagram below.
- Select PEAP and click Configure.... Enter anonymous@dcu.ie
- ClickOK
- ClickConfigure Trust...
- Select Servers tab.
- Click+ and name the new entry idp-wireless.dcu.ie
- Click OK
- Click OKat the new profile window.
- Click Applyin the Network window.
- Highlight Airport and click Advanced... once more
- Click on + to add Eduroam as a preferred network.
- Enter the details as per the diagram.
- Click Add.
- You can make Eduroam your preferred network by dragging the Eduroam entry to the top of the list of preferred networks.
- Click OK.
- Click Apply.
N.B. You must enter your DCU Novell/AD network username and password in the form of : username@dcu.ie e.g. bloggsj22@dcu.ie
This is NOT your e-mail address.